Getting started with automation
LaunchBrightly’s screenshot automation platform allows you to set up automation recipes to auto-generate screenshots of the last version of your product and, automatically and continuously, update the screenshots in your help documentation as your product changes. Below is a simple quick-start guide.
Create a secure login profile
Capture screenshots from behind the login of your application.
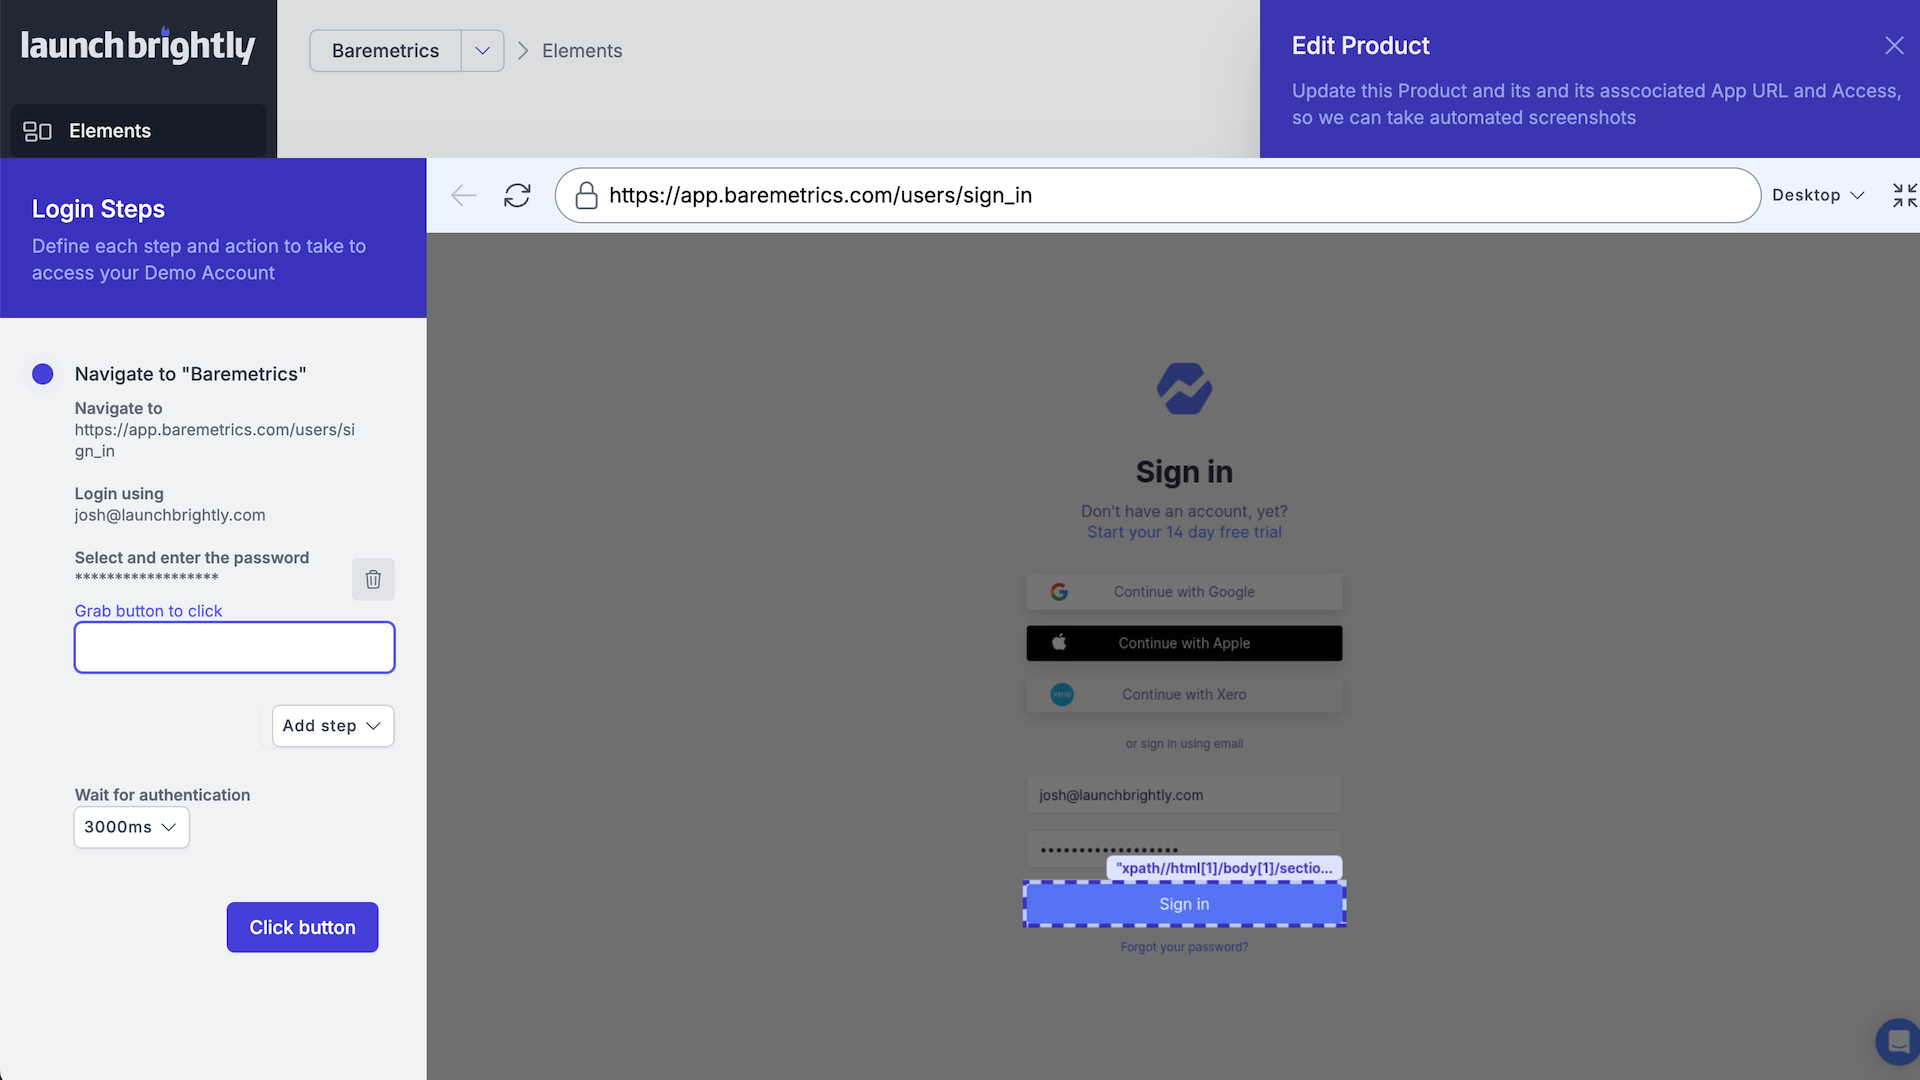
- Navigate to the URL for the login page of your application
- Identify the Username Input Box and add the username for your demo account
- Identify the Password Input Box and add the password for your demo account
- Identity and click buttons in your authentication flow like Continue or Login
Replicate the login actions of a regular user to capture screenshots from behind the login of your application—without requiring engineering support. The login profile is fully customizable and was designed to support any authentication setup. Use the point-and-click screenshot setup wizard to, among other things:
Set up your first simple recipe and process it
Use the point-and-click screenshot setup wizard to create an automated screenshot sequence.
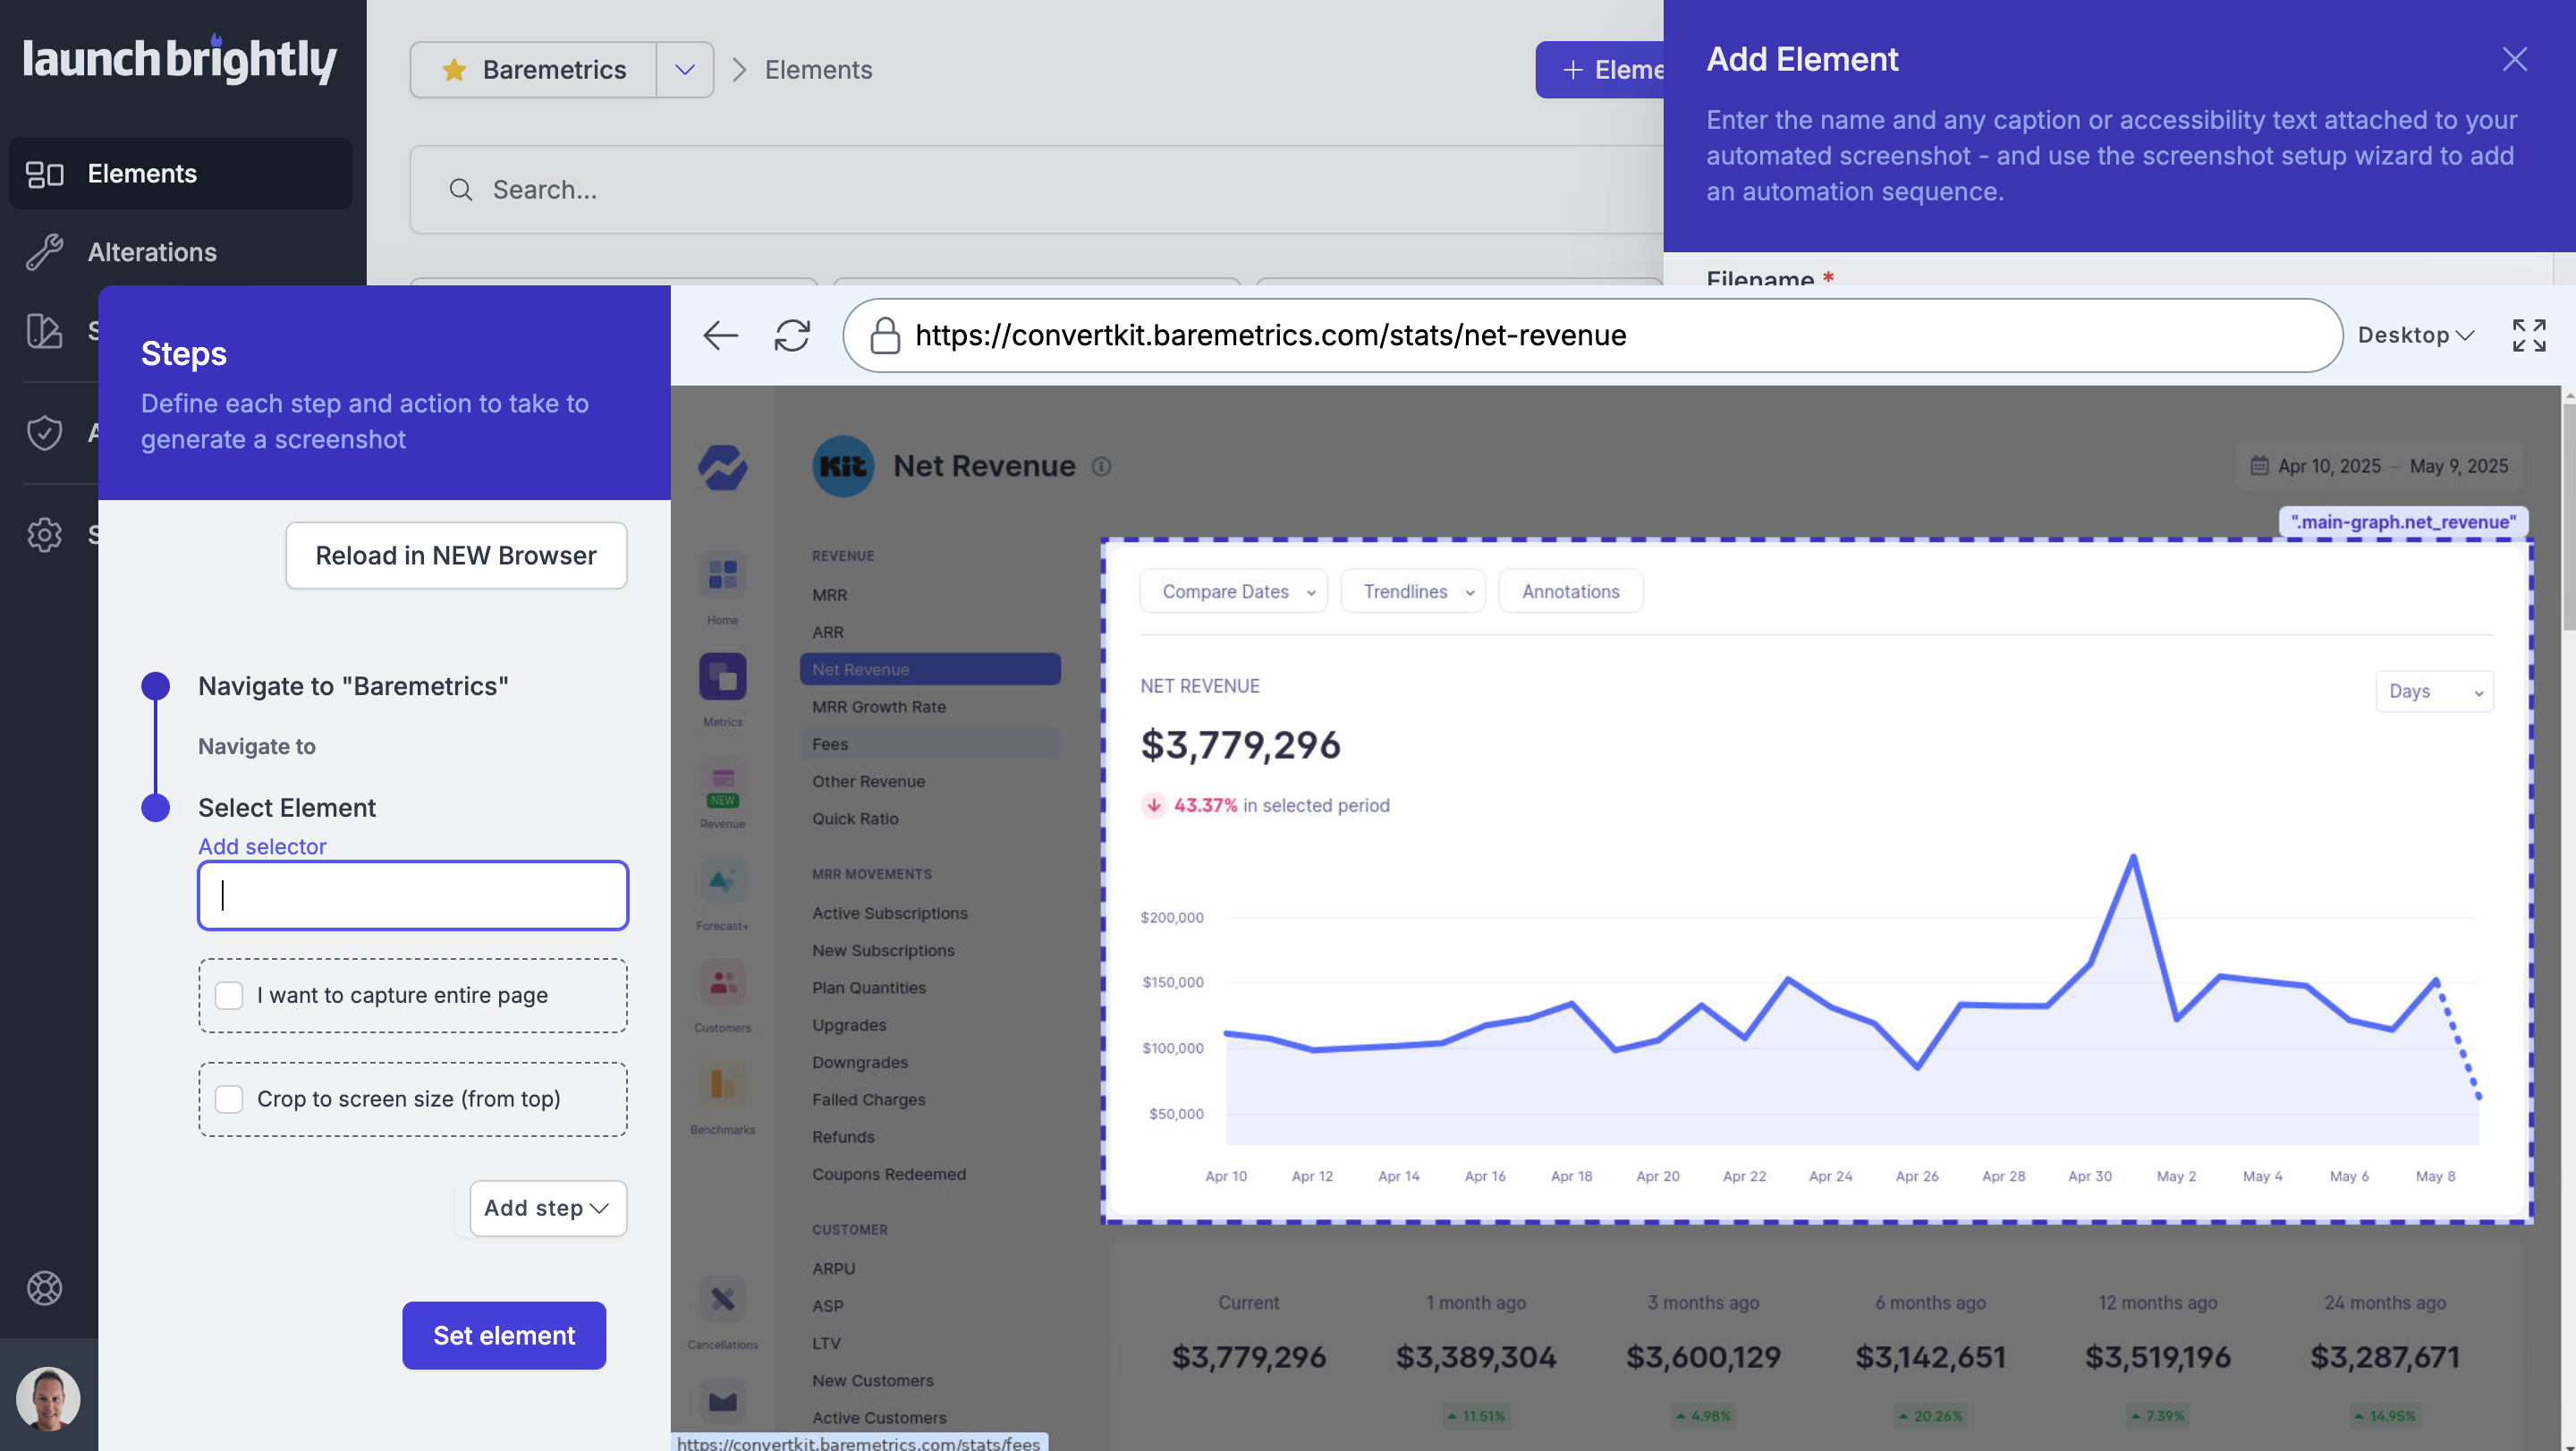
- Navigate to the URL in your application where the product element you would like to capture lives
- Record the steps to prime your screenshot–from clicking buttons, to adding input text, and removing specific elements
- Identify elements you would like to automatically add precise annotations to whenever your screenshot is generated
- Automatically apply a set of visual enhancements to each screenshot ensuring consistency
The screenshot recipe builder meticulously records your steps to create an automated screenshot sequence that can be run repeatedly to capture your screenshots. Use the point-and-click screenshot setup wizard to:
The screenshot recipe builder allows you to select specific product elements that you would like to, automatically and continuously, capture screenshots of. Or, rather than capturing specific elements on the page, use the recipe builder to automatically capture full page screenshots from your application.
Let us help you get started!
Our Implementation Specialists will create custom automation recipes for each of your existing screenshots to instantly refresh your help center—the one-time implementation service is complimentary for NEW customers.
Millions of product screenshots for amazing support teams around the world


Their methodical approach, automation platform and expert insights made the process seamless and efficient, saving us any number of valuable hours on manual work.